Using Tags to categorize Notes
When you take notes every day, having all of them in a single list becomes unmanageable very quickly. Note tags are used to address this problem. While editing a note, you can specify any text in the note’s “Tags” field. Later you can use part of this text to quickly filter out notes which don’t contain it in their “Tags” field, thus greatly narrowing down your search.
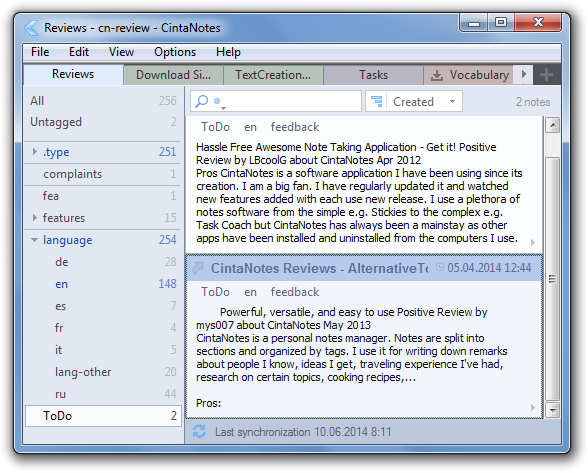
For example, you might decide to tag notes as a ToDo list with a “ToDo” tag. So every time you take such a note, you put “ToDo” into the “Tags” field. After that this tag will appear on the Tag Sidebar (see the screenshot below), so you will be able to highlight it, and CintaNotes will display just your ToDo notes. Alternatively, you can turn on Tag Search (see “Finding notes” section) and type “ToDo” as your search string.
![tag_sidebar]()
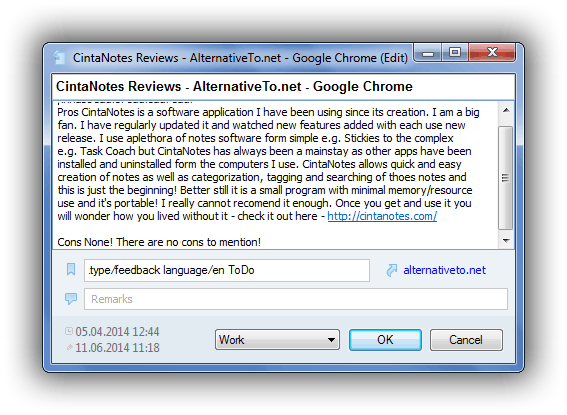
If you want to associate two or more tags with a note, just put them all into the “Tags” separated by spaces (comma and semicolon can also be used but will be automatically converted to spaces).
![tags013]()
Tags can include symbols, not just alphanumeric characters, i.e. “#1!” is a valid tag. Remember also that tags are not case-sensitive.
Tag names cannot include spaces, but you can make multi-word tags using different casing (like this: “MultiWordTag”), underscore (“Multi_word_tag”) or hyphen (“Multi-word-tag”).
It is possible to tag several notes at once: just select them and press F4 (or select the Tag… command from the context menu).
![tags_add_remove]()
The Edit/Replace Tags command allows tag renaming, splitting, merging and deleting. Generally, each tag specified in the first edit box is replaced with all tags from the second edit box.
![tags_replace]()
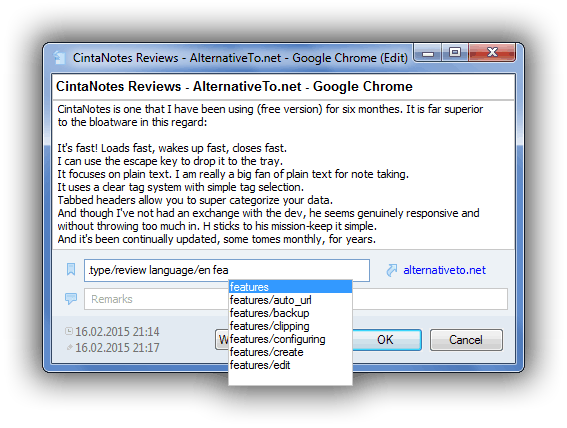
Tag auto-completion
In any tag-entering field CintaNotes displays a drop-down list of available tags as soon as you start typing. Pressing Spacebar, Enter or Tab accepts the currently highlighted suggestion, whereas Esc or Del cancels it. You can also force auto-complete display by pressing Ctrl+Space.
![tag_autocomplete]()
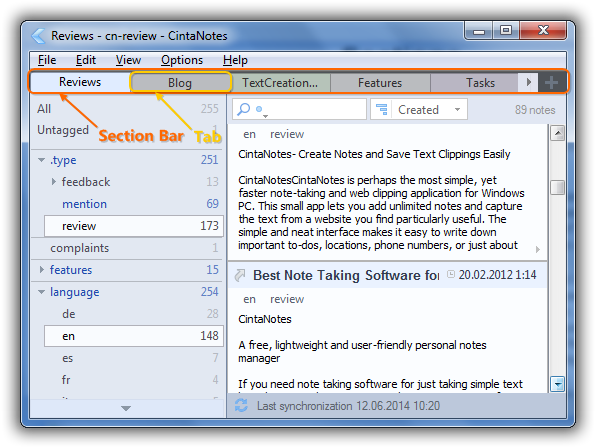
Using the Tag Sidebar
Tag Sidebar is a handy tool for fast access to different tags and tag sets.
The sidebar is not displayed by default; you can turn it on using the View/Tag Sidebar menu command.
There is a list of clickable labels on the sidebar. The first two labels are “All” and “Untagged”, which are predefined and cannot be changed. When you click on the “All” label on the sidebar, you make sure that no tag filter is applied. The “Untagged” label will display only notes having no tags.
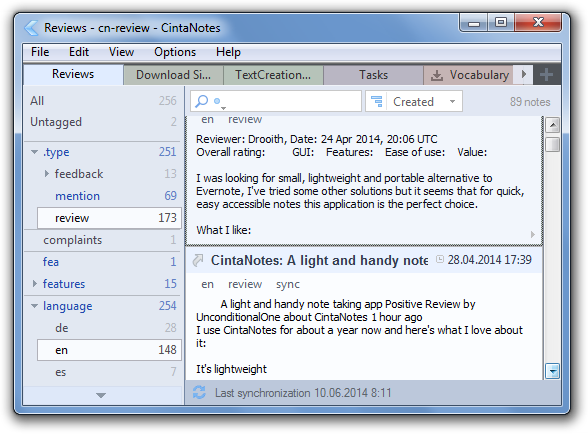
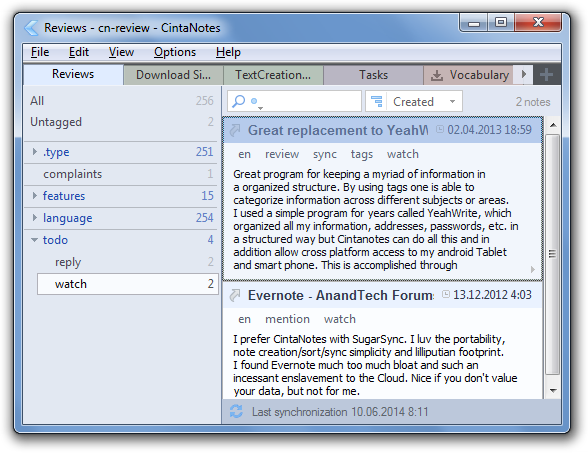
Here’s an example of using CintaNotes for creating a small dictionary with technical terms:
![tag_sidebar_labels]()
The Untagged label is your natural note inbox which gives you quick and convenient access to recently captured information that needs to be categorized (provided you are using tags, of course).
Directly below is the list of all tags defined in the notes. This list displays all tags in alphabetical order. If the list is long and doesn’t fit, two scroll buttons appear (you can also scroll this list using the mouse wheel, and this is probably the most convenient way).
To the right of each tag is the number of notes in the current notebook which have that tag applied. This allows you to easily see which tags are underused and can be merged or removed. Tag count display can be turned off in Options / Tags menu.
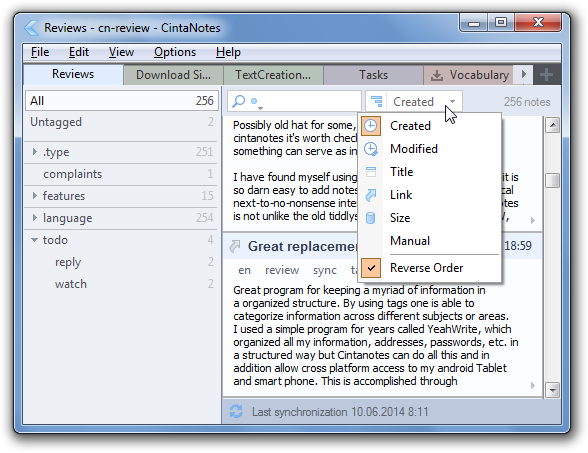
Clicking on a tag activates it, and only notes having this tag will be displayed. Using Ctrl+Click or Shift+Click, you can expand the tag selection to additional tags. Keep in mind that with Ctrl+Click, a tag intersection is used when multiple tags are selected (i.e. notes having all of the selected tags will be included), whereas with Shift+Click, a tag union is used (i.e. notes having any of the tags will be included).
There is also a possibility to exclude (subtract) tags from the set via Alt-clicking on them. The excluded tags will show as strikeout with a bluish background. Only the notes which have been selected via tag union or tag intersection tags, and which additionally don’t have any of the excluded tags, will be shown in the list.
Tags selected in tag union mode have a yellowish highlight, whereas tag intersection tags will have the normal white highlight. The three modes are mutually exclusive.
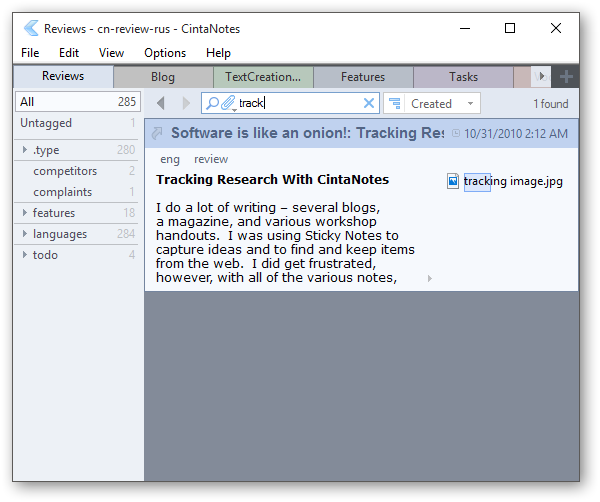
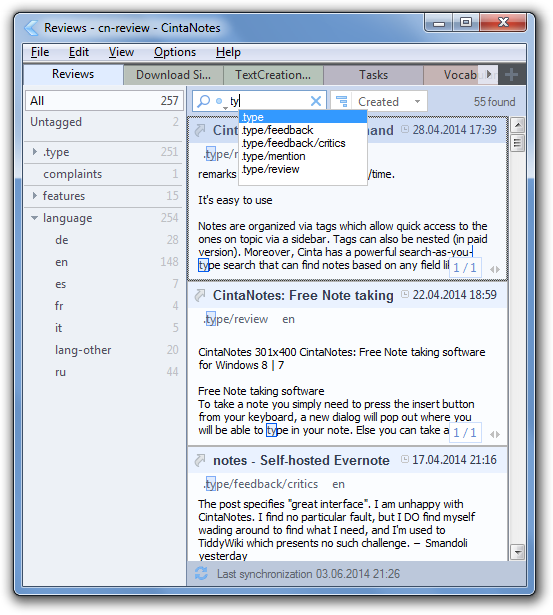
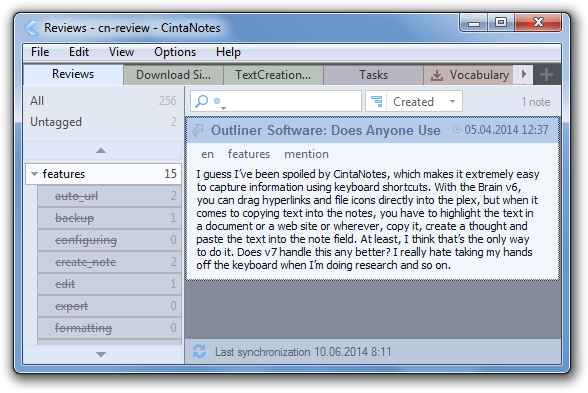
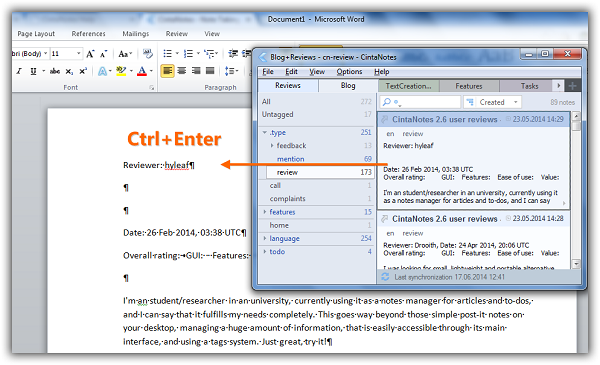
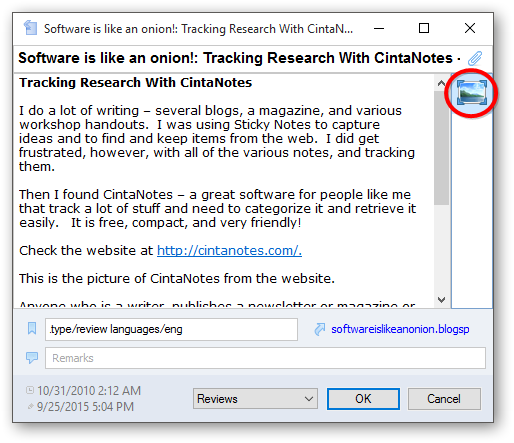
Here you can see a typical tag intersection. Only notes which have both tags “en” and “review” are selected:
![tag_sidebar_tag_union]()
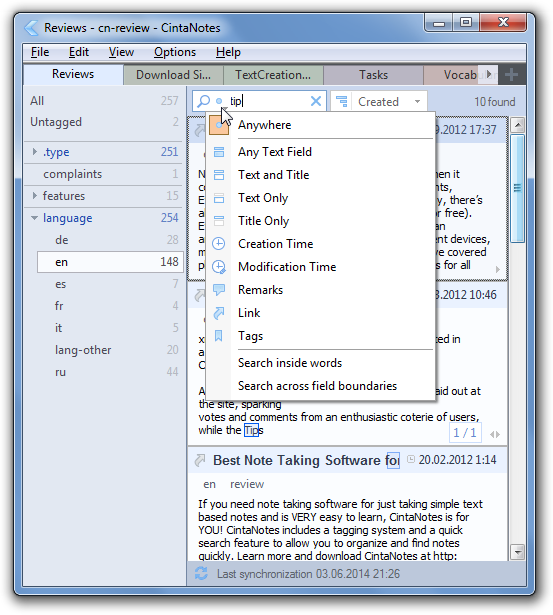
Entering tags into the search box also implies tag intersection. The difference here is that
you don’t have to use your mouse, and that you don’t have to enter complete tags.
There are also some advanced commands:
Ctrl+Alt+Click crosses out all tags except the clicked one, to display
notes having this tag only and no other tags:
![tags_cross_out_children]()
Shift+Alt+Click crosses out all children of a parent tag, to display notes having this parent tag but not having any of the child tags (see the Tag Hierarchy section for more details about parent and child tags):
![tags_cross_out_children]()
Tags which are related to any tag of the currently selected set are displayed in a blue color. Two tags are considered related if there are notes which have them both:
![tags_related_tags_highlighted]()
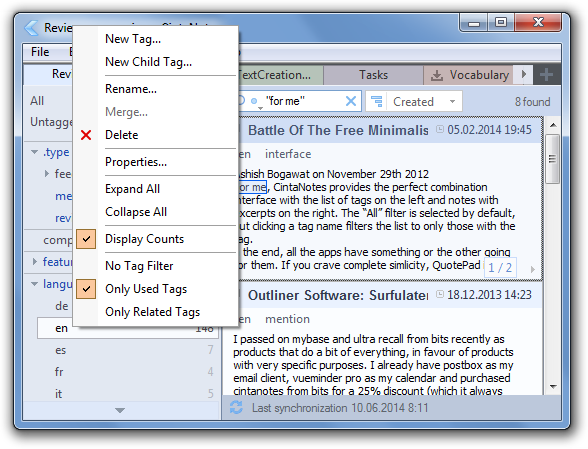
Each tag label on the Tag Sidebar has a right-click context menu which allows you to rename or delete a given tag. When multiple tags are selected, you can merge them as well:
![tags_rename_delete]()
Tag List Filters
The list of tags can be filtered to make it easy to work with many tags. In the Tag Sidebar’s context menu, there are three options for tag filtering:
- No Tag Filter – all tags from all sections are displayed;
- Only Used – only tags used in the currently selected sections are displayed, that is, tags having
the use count greater than zero;
- Only Related – only tags related to the current tag selection are displayed. As you switch selected tags, the tags are updated to display only related ones. Two tags are related if there exists a note which has both of them. (So by definition these are tags which have a use count greater than zero.)
It is also possible to activate the “Only Related” mode by double-clicking the tag name. But since this collides with the usual tree collapse / expand actions, you need to enable this explicitly via setting the “app.mainframe.tagsidebar.doubleclick.onlyrelated” parameter of the cintanotes.settings file to 1.
Editing tag properties
To view and edit the properties of a tag, right-click it in the Tag Sidebar and select “Properties”.
![tags_properties]()
Auto deleted – When this option is set, tags will be automatically deleted when there are no more notes with this tag. Tags created via the “Tags” field of the note editor have this option set by default.
Expanded by default – Applicable to parent tags only. When this option is set, the tree branch will be automatically expanded when the notebook is loaded. This enables you to keep commonly-used child tags always visible.
Tag Hierarchy
To further enhance the organization of your notes using tags, tags can be organized into a hierarchic structure.
Such a tree-like structure is very useful for creating various taxonomies.
Why should you organize your tags into a tree? There are two main benefits derived from organizing tags into trees:
- You can easily generalize and specialize tags. For example, where you might use the tags todo, reply, and watch, you can instead use todo/reply and todo/watch. todo becomes a parent tag in this case. By selecting this tag on the sidebar, you can see all the things you need to do, regardless of the type of action that needs to be taken. Without tag hierarchy, you would need to select all these tags one by one to get the same result.
- When you have a lot of tags, it quickly becomes difficult to manage them and to find them on the sidebar. If your tags are organized into groups by parent tags, you can easily locate the tags you need.
![tags_hierarchy02]()
Creating a tag hierarchy is simple. Just create tags with forward slashes in their names, for example Cars/SportCars/Ferrari, Projects/MyProj1 or GDP/Europe/UK. To create a hierarchy from existing tags, rename them (e.g. rename SportCars to Cars/SportCars and Ferrari to Cars/SportCars/Ferrari).
![tags_hierarchy01]()
Due to the parent/child relationship, when you add a tag such as movies/comedy to a note, two tags are actually added: movies and movies/comedy. And when you delete a tag from a note, any child tags are deleted from that note automatically.
Tags are always referred to by their full name (with all parent tags as a prefix), so you can’t write comedy and expect CintaNotes to understand that you really mean movies/comedy. This might seem limiting at first, however in reality it is not, since with tag auto-complete you don’t have to write these long tag names by hand. For example, to enter movies/comedy, you type “co” or “com” and then select movies/comedy from the suggestions list.
The most important thing to understand about tags in CintaNotes is that when tag A is a parent, and tag B is its child, tag B is really called A/B and in all places will be referred to as such. Tag B would refer to a tag named simply B (i.e. on the top hierarchy level). This means that both tags B and A/B can exist at the same time, but are different tags.
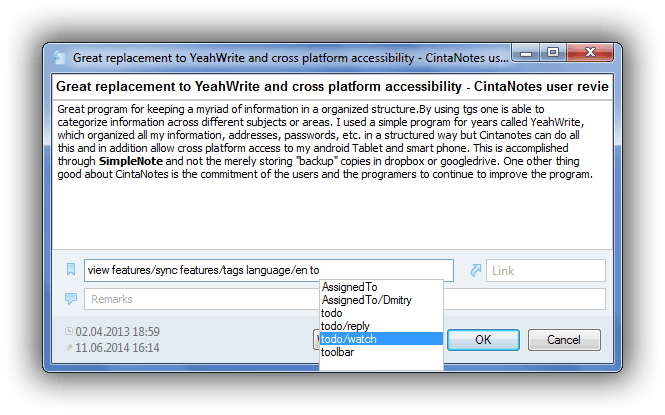
Moving tags around the hierarchy is accomplished by renaming them. Renaming tags is done by right-clicking
on the tag in the Tag Sidebar and selecting the “Rename” option from the menu.
![tags_replace]()
Example 1: Given the tag hierarchy A/B/C, to move tag C to the top level, rename A/B/C to C.
Example 2: Given the tag hierarchy A/B/C, to move tag C to the second level, rename A/B/C to A/C.
Example 3: Given the tag hierarchy A/B/C, to make tag A the child of some other tag D, rename A to D/A (note that children of A will be renamed automatically, so the whole hierarchy will become D/A/B/C).
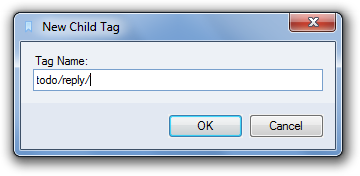
New child tags can be created by right-clicking on the tag that you want to be the parent in the Tag Sidebar and selecting the “New Child” option from the menu. (Note that this is a convenience option, since the same can be done via selecting the “New…” entry of the Tag Sidebar context menu and specifying the full child tag name.)
![tags_new_child_create]()
Tag hierarchy is supported in all license options of CintaNotes. However, the tag hierarchy tree view is only available to PRO License holders. This allows you to view your tag relationships as trees, with parent nodes at the top and child nodes beneath. You may collapse branches so only the parent tags are visible, enabling you to keep your Tag Sidebar with less clutter.
When using the Basic (Free) License, tags are shown in the Tag Sidebar with their full names.
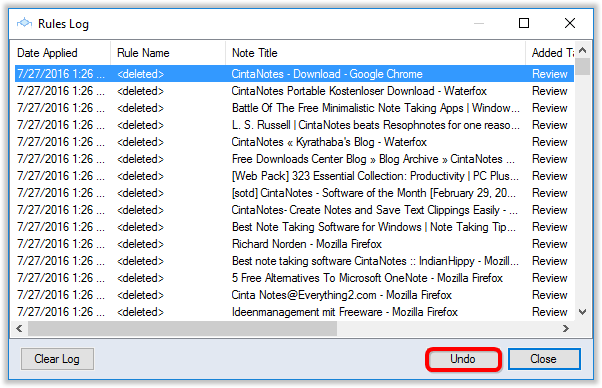
 You can also check for updates manually with the Help/Check for Updates command. The same window allows you to turn off the automatic update check in case you don’t want to be notified.
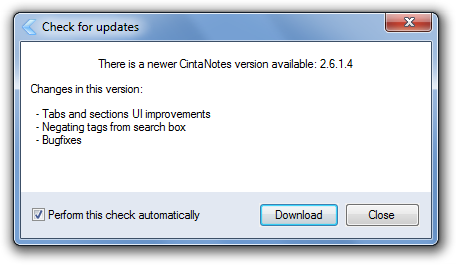 After downloading the updated package, usually all you need to do is point the installer to your CintaNotes folder.


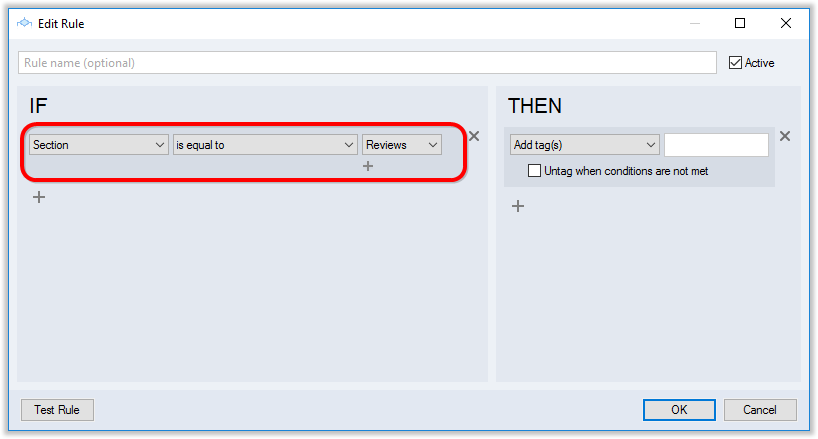
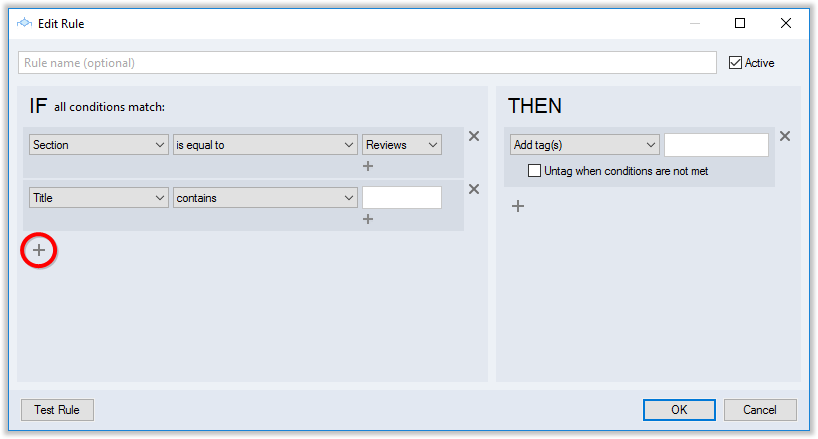
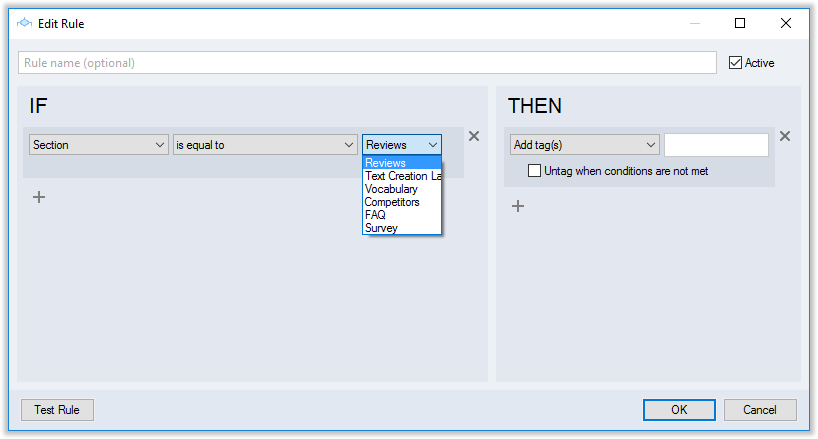
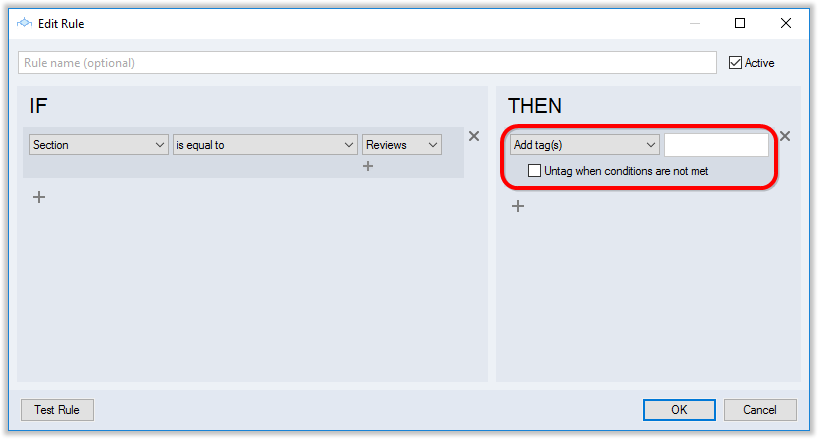
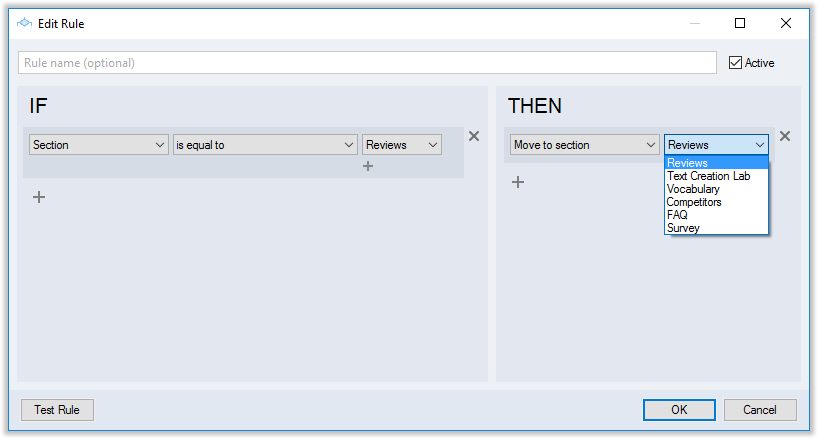
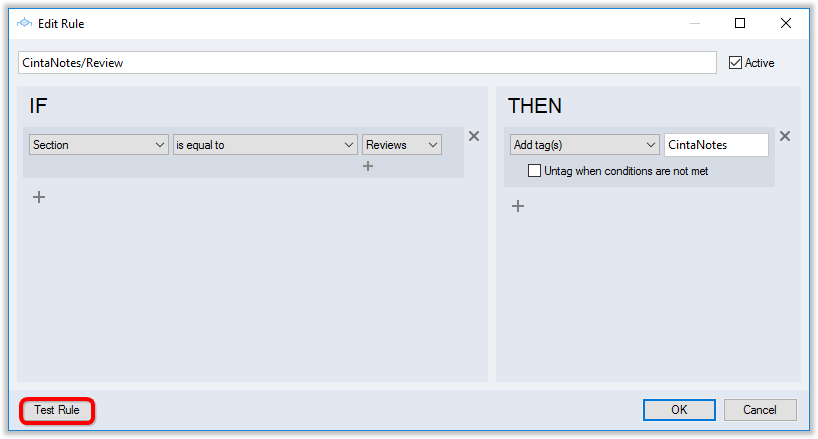
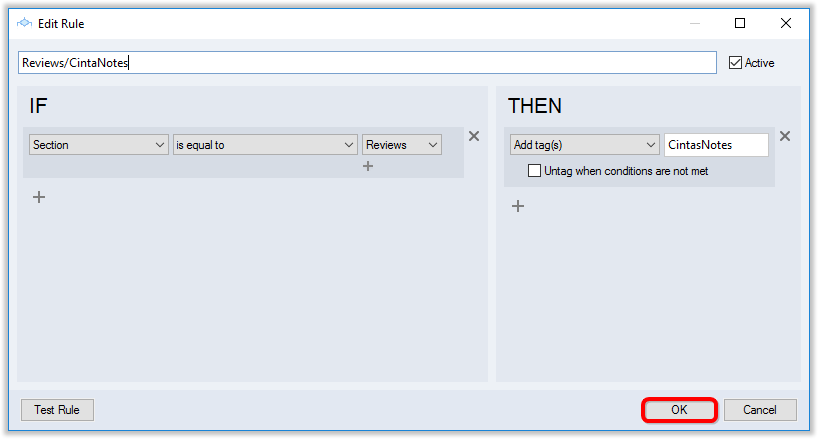
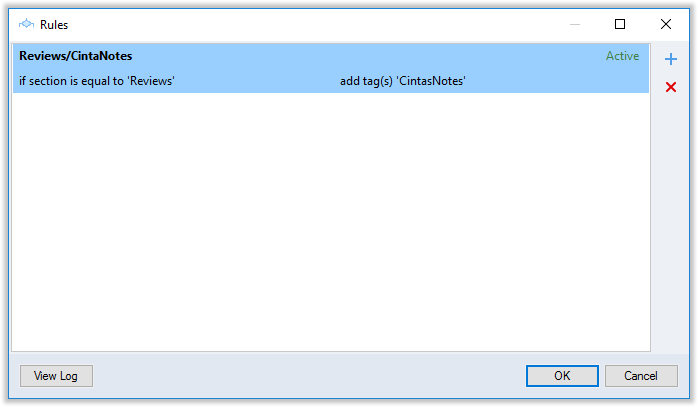
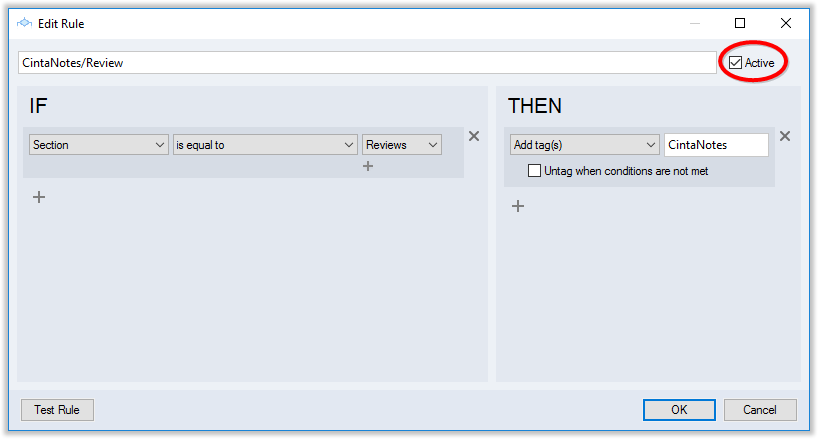
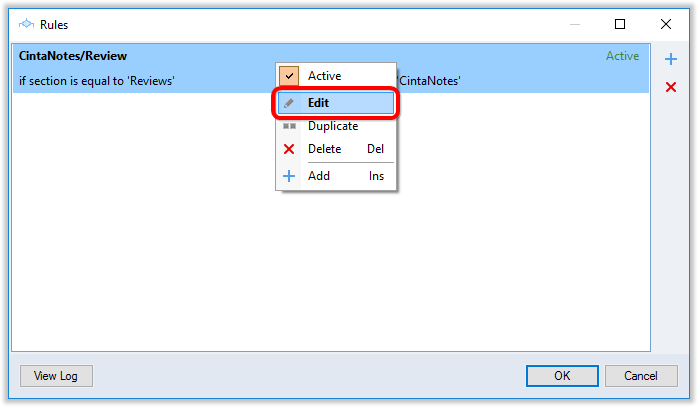
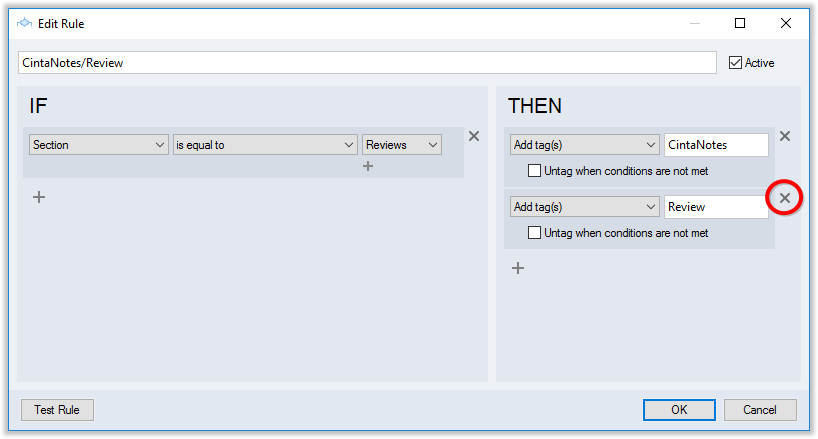
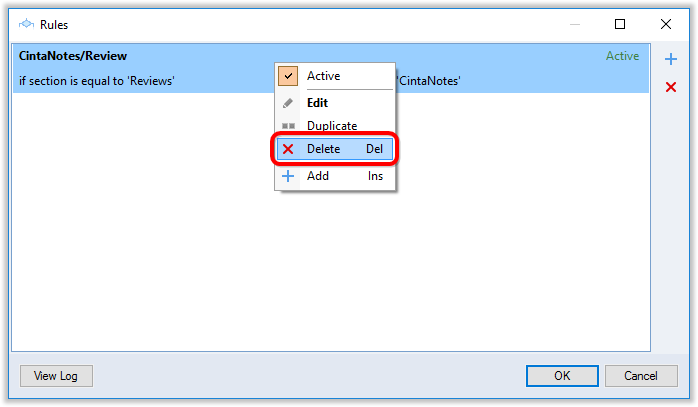
 You can give a name to your rule, but this is not required: CintaNotes will set the rule name automatically based on rule actions in the “THEN” section.
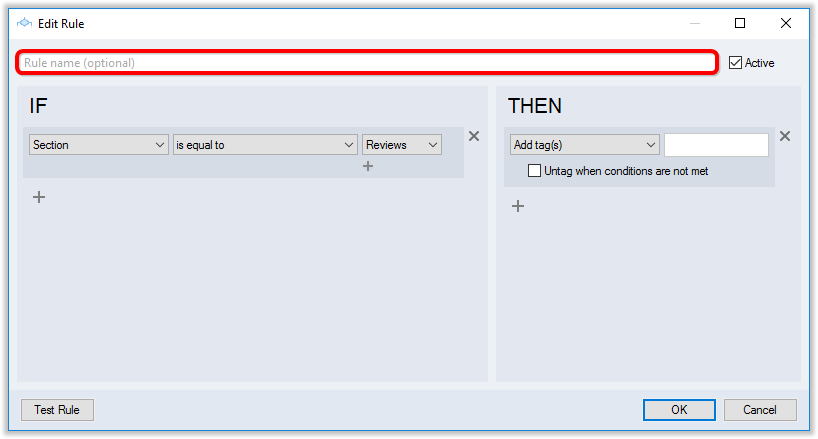


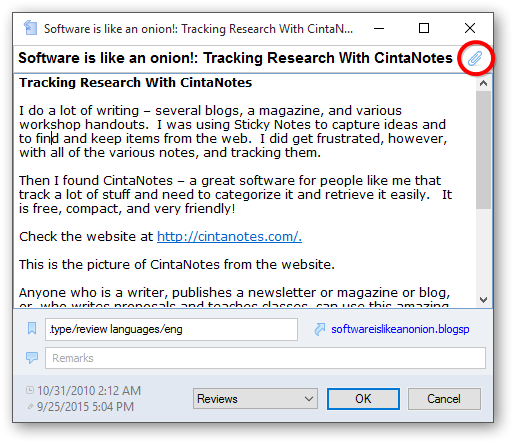

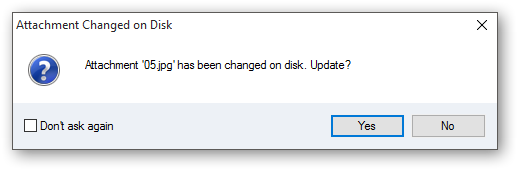
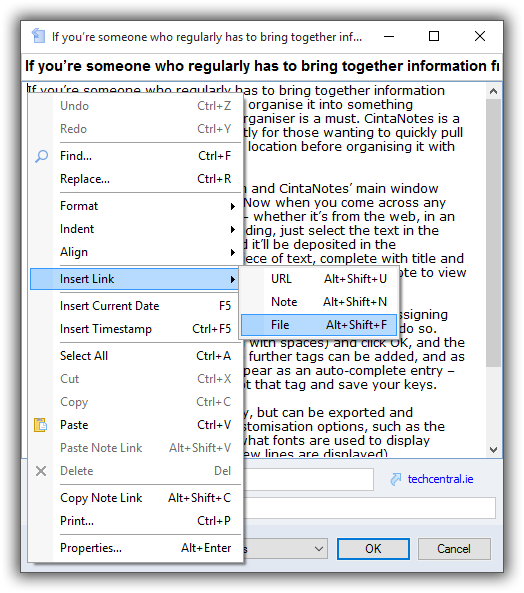
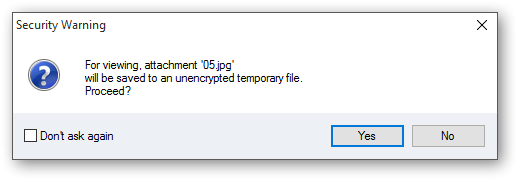 If you modify the extracted attachment file after opening it, CintaNotes will detect this and will prompt to update the attachment by displaying the following message box: